Showing posts with label diy. Show all posts

Wednesday, February 3, 2016

Bath Bomb Collab with Hodgespodges

Today I am super excited to share a collaboration I did with my friend and neighbor, Joey from Hodgespodges. We met last Fall and pretty soon after we started hanging out regularly, she mentioned making DIY bath bombs together.  I fell in love with the idea and before we knew it, we were buying citric acid and a kitchen scale. So -- we are basically bonded for life now. Read Joey's bath bomb post here


Over the years, I've purchased my share of Lush Bath Bombs but for as long as I can remember, I've always wanted to try making my own. Ever since I was a little girl, I have always loved taking baths. I probably prefer them more than I prefer taking a shower if I don't have to wash my hair.  I am also very big on self care and taking a bath is one of the things I do when I am taking time out of my busy day to take care of me. So -- without further ado, below is the recipe that we used (adapted from here).   

DIY Bath Bombs 

What You'll Need (each portion below makes 2 bath bombs):

  • 4 oz. baking soda
  • 2 oz. cornstarch
  • 2 oz. citric acid
  • 2 oz. epsom salt
  • 1 1/2 tsp water
  • 1 tsp essential oil (we used peppermint, lavender and lemongrass).
  • 1 1/4 tsp coconut oil
  • 1-2 drops food coloring 
  • Molds (we used plastic christmas ornaments) 
  • kitchen scale to measure oz. 


Steps:

1. Combine dry ingredients (baking soda, cornstarch, citric acid, and epsom salt) in a large mixing bowl.

2. In a separate bowl, whisk together the wet ingredients. Be sure to melt the coconut oil beforehand in the microwave for 10 second intervals. This is what is going to hold your bath bombs together. 


3. Slowly pour the wet mixture into the dry mixture and whisk as you go. 


4. Fill up your molds. Press two molds together and remove one mold. Let dry for 10 minutes before removing the other side of the mold. I think this is where we messed up with ours as the two sides did not stick together the following day after we let them set for 24 hours.


Tip: We used purple food coloring for the lavender, green for peppermint and yellow for lemongrass. 


The finished product: 


I had so much fun making these with Joey! Now, it's not a quick process but it's actually very therapeutic and calming -- it was my first time using essential oils -- but it will definitely not be my last. 

Have you tried to (or do you want to) make bath bombs at home? Please share your thoughts in the comments! 

xoxo,

Friday, November 16, 2012

Holi-DIY @ Anthropologie

My bestie Megan and I went to happy hour after work yesterday {woo!} and then headed over to the annual anthropologie DIY holiday crafting event at the downtown Seattle store.  The project was color blocked coasters - lead by none other than Cassandra of Coco + Kelley! We were a little star struck but didn't want to be stalker weirdos. 

The 4 coasters I made!  
Megan's coasters!
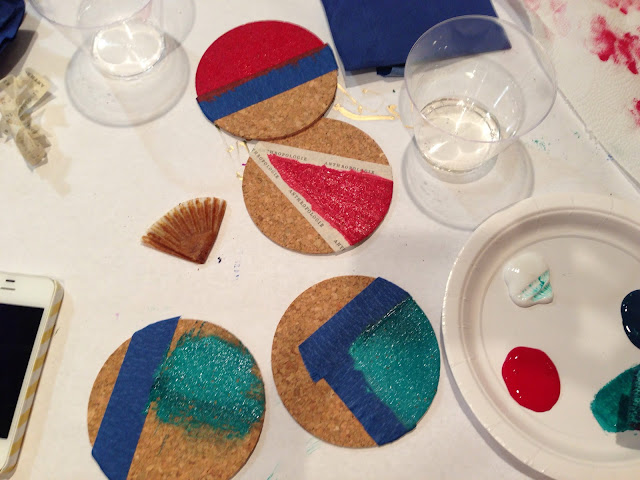
What are color blocked coasters, you ask? It's pretty simple! You just paint designs on a coaster. You could do color blocked or any other geometric designs.  We each got to make 4! 

Cassandra explaining what to do and not to do!
My setup - including a special mini cupcake for my birthday! :) Not really but let's pretend!
Work in progress
Still working away...
The final product! Love them! Except for my pepsi logo on the bottom left. Oops.

Do you like how I matched mine to my outfit? :)
Some people thought we were sisters! Are we? Nope, just besties!
Our view from the 2nd floor, downtown Seattle.
Christmas is getting closer! Have you done any fun Christmas DIY projects lately?

Tuesday, November 6, 2012

D-I-Y David

Remember this post where I picked up my beloved bust of David right after we got back from Italy? He was a score at $20 but I probably could have haggled it down a bit. I placed him on our bookshelf here and I thought he looked pretty good, but something still wasn't right. He needed a fresh pop of color paint job.

Enter: my first spray painting experience! My friends Megan and Shan {and I} had been planning a craft day, so what better time than now to start paining David?

Step 1: Pick out spray paint. I was deciding between this bright yellow and sort of teal blue. It's also important to purchase {and use} primer. Megan learned that the hard way. 


Step 2: Read directions on the back of the spray paint can. Primer 2 coats.
I actually kind of liked him white but our apartment is all white so he would be hidden if I left him this color. 

Step 3: Spray paint 2 coats of final color {yellow!}
Step 4: Allow 30-40 minutes to dry before transporting him in your car to your apartment from said friend's house. Allow 48 hours to dry completely.

Step 5: Do not drop David and get spray paint on your leather seats in your car. If you do, look up real quick on the internet how to remove it {hairspray on a cotton ball? Hallelujah!}

Step 6: Do not attempt to spot touch up because you dropped him on his head. It is probably windy and the spray paint will end up where you don't want it.

Step 7: Display on your bookshelf!

I survived my first DIY spray paint project! Barely....

The end!